
As the holiday season approaches, many of us are on the lookout for classic desserts that bring nostalgia and joy to our Christmas celebrations. One such treat is a timeless favorite that combines a buttery shortbread base, a sweet filling, and a powdered sugar topping.
This decadent dessert is perfect for holiday gatherings, and its simplicity makes it a great choice for bakers of all levels. With its rich flavors and charming presentation, it’s sure to become a new family tradition.
Let’s take a closer look at this beloved holiday treat and explore why it’s a great addition to your Christmas dessert menu.
The Sweet History of Holiday Cherry Desserts
The sweet and tangy flavor of cherry bars has made them a favorite during the holiday season, rooted in a history that spans generations. As we explore the evolution of these classic Christmas treats, it becomes clear that their enduring appeal lies in a rich history and cultural significance.
Origins of Fruit Bars in American Baking
Fruit bars, including cherry desserts, have their origins in the early baking traditions of European settlers in America. These settlers brought with them recipes and techniques that were adapted to the ingredients available in the New World. Cherry bars, in particular, became popular due to the abundance of cherries and the ease of preserving them through baking. This tradition not only provided a taste of home but also introduced new flavors and textures, enriching American baking.
How Cherry Bars Became a Christmas Tradition
Cherry bars became a staple of Christmas celebrations due to their festive color and the symbolism associated with cherries. The fruit is often seen as a representation of joy and abundance, making cherry desserts a fitting choice for the holiday season. As holiday baking ideas evolved, cherry bars stood out for their simplicity, flavor, and visual appeal, cementing their place as a beloved Christmas tradition.
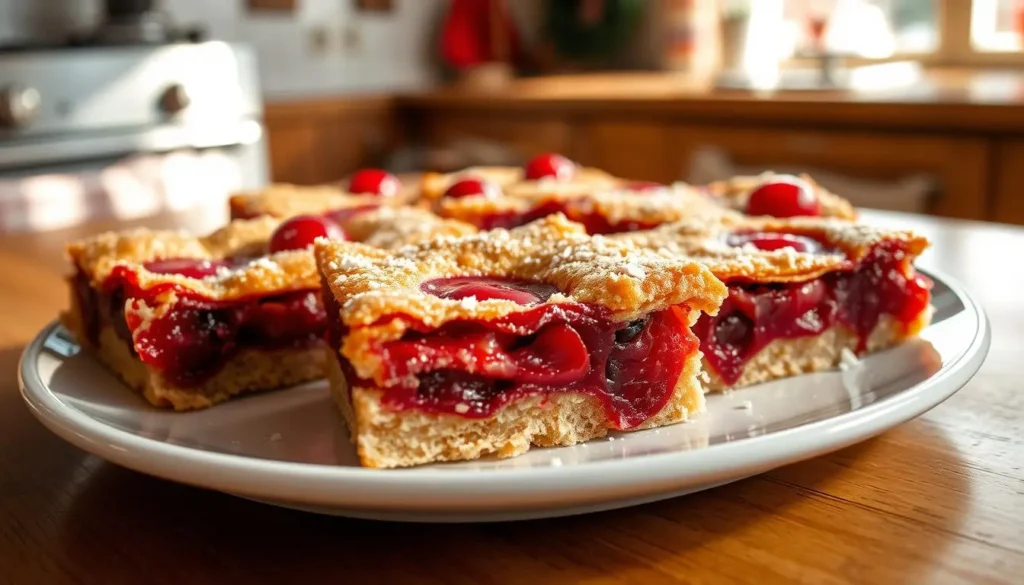
Old Fashioned Christmas Cherry Bars: The Classic Recipe
Old Fashioned Christmas Cherry Bars are a classic holiday treat that combines a buttery shortbread crust with a sweet cherry filling. This vintage cherry bar recipe has been a staple of homemade Christmas desserts for generations, bringing joy to families during the holiday season.
Ingredients List and Substitutions
To make these delicious bars, you’ll need the following ingredients: 1 1/2 cups all-purpose flour, 1/2 cup confectioners’ sugar, 1/4 teaspoon salt, 1/2 cup unsalted butter (cold and cut into small pieces), 1/2 cup granulated sugar, 2 large eggs, 1 teaspoon almond extract, 1 cup cherry jam or preserves, and 1 cup chopped pecans or walnuts (optional).
For those with dietary restrictions, consider substituting gluten-free flour for the all-purpose flour. You can also use vegan butter or margarine instead of unsalted butter. If you prefer a different flavor, you can substitute the almond extract with vanilla extract.
Kitchen Tools and Equipment Needed
To prepare Old Fashioned Christmas Cherry Bars, you’ll need a few essential kitchen tools: a 9×9-inch baking pan, a medium bowl, a large bowl, a pastry blender or fork, and a measuring cups and spoons. Having the right equipment ensures a smooth baking process.
Prep Time and Yield Information
Preparation time for this recipe is approximately 20 minutes, with a baking time of 40-45 minutes. The yield is 9-12 bars, depending on how you cut them. This information helps you plan your baking schedule, especially during the busy holiday season.
Step-by-Step Baking Instructions
To make these scrumptious cherry bars with powdered sugar, follow these step-by-step baking instructions carefully. The process involves preparing a buttery shortbread base, creating a perfect cherry filling, and assembling the bars for baking.
Preparing the Buttery Shortbread Base
The foundation of your festive cherry bars is a crumbly shortbread crust. To prepare it, you’ll need to combine 2 cups of all-purpose flour, 1/2 cup of granulated sugar, and 1/4 teaspoon of salt in a bowl. Add 1/2 cup of cold unsalted butter and use a pastry blender or your fingers to work it into the dry ingredients until the mixture resembles coarse crumbs.
Press this mixture evenly into a 9×9-inch baking pan lined with parchment paper. Bake in a preheated oven at 350°F (175°C) for about 20 minutes, or until the edges are lightly golden.
Creating the Perfect Cherry Filling
While the crust is baking, prepare the cherry filling. In a saucepan, combine 1 cup of cherry jam, 1 cup of fresh or frozen cherries, and 2 tablespoons of cornstarch. Cook over medium heat, stirring constantly, until the mixture thickens and the cherries are well coated.
This filling should be thick but still moist. If using frozen cherries, ensure they are thawed and drained before use.
Assembling and Baking Your Bars
Once the crust is ready, spread the cherry filling evenly over it. If desired, add a layer of chopped nuts or additional cherries on top. Return the pan to the oven and bake for an additional 25-30 minutes, or until the filling is bubbly and the crust is golden brown.
| Baking Stage | Temperature | Time |
|---|---|---|
| Shortbread Crust | 350°F (175°C) | 20 minutes |
| Assembled Bars | 350°F (175°C) | 25-30 minutes |
After baking, let the bars cool completely in the pan before cutting into squares and dusting with powdered sugar. This final touch not only adds sweetness but also makes your festive cherry bars visually appealing.
Mastering the Finishing Touches
With your cherry bars baked to perfection, the next step is to add the finishing touches that elevate them from delicious treats to stunning holiday desserts. The presentation of your Old Fashioned Christmas Cherry Bars can be just as important as their taste, making them a standout at any holiday gathering.
The Classic Powdered Sugar Topping
A traditional holiday cookie finishing touch is a generous dusting of powdered sugar. To achieve this, simply use a fine-mesh sieve or a small sifter to sprinkle powdered sugar evenly over the cooled bars. For an extra-special touch, you can chill the bars in the refrigerator for about 10 minutes before dusting to help the sugar adhere better.
Festive Decorating Ideas for Holiday Gatherings
To make your easy holiday baking recipe truly shine, consider adding some festive decorations. You can use red and green candied cherries, chopped nuts, or even edible glitter to give your bars a holiday flair. For a more elegant look, try arranging a pattern of powdered sugar on top using a small stencil or a cookie cutter as a guide.
Proper Cooling and Cutting Techniques
Before you can add your finishing touches, it’s crucial to cool and cut your bars properly. Allow the bars to cool completely in the pan on a wire rack. Once cooled, use a sharp knife to cut them into clean, even squares. For a crisper edge, you can chill the bars in the refrigerator for about 30 minutes before cutting.
By mastering these finishing touches, you’ll ensure that your Old Fashioned Christmas Cherry Bars are not only delicious but also visually appealing, making them a perfect treat for your holiday celebrations.
Troubleshooting Tips and Expert Advice
Creating the perfect old-fashioned Christmas cherry bars requires attention to detail and some troubleshooting tips. Whether you’re a seasoned baker or trying your hand at a vintage cherry bar recipe for the first time, understanding common challenges and how to overcome them is key to success.
Common Cherry Bar Baking Challenges
One of the most common issues bakers face when making cherry bars is achieving the right consistency for the shortbread base and the cherry filling. If the base is too crumbly, it might be due to overmixing or incorrect butter temperature. On the other hand, a filling that’s too runny could result from not cooking it long enough or using the wrong type of cherries.
Tips for a Perfect Shortbread Base: Ensure your butter is at room temperature, and avoid overmixing the dough. If you’re using a vintage cherry bar recipe, you might need to adjust the butter content slightly.
| Issue | Cause | Solution |
|---|---|---|
| Crumbly Base | Overmixing, cold butter | Mix just until combined, use room temperature butter |
| Runny Filling | Insufficient cooking, wrong cherry type | Cook until thickened, use appropriate cherries |
Make-Ahead, Storage, and Freezing Guidelines
For holiday baking ideas that simplify your season, consider making your cherry bars ahead of time. These bars can be prepared, baked, and then stored in an airtight container at room temperature for up to 3 days.
Freezing Tips: To freeze, cut the bars after they have cooled completely, then wrap them individually in plastic wrap or aluminum foil. Store in a freezer-safe bag for up to 2 months. Thaw at room temperature or refrigerate overnight before serving.
By following these expert tips and guidelines, you’ll be well on your way to creating delicious old-fashioned Christmas cherry bars that are sure to be a hit at any holiday gathering.
Delicious Variations and Modern Twists
The classic Old Fashioned Christmas Cherry Bars recipe is a versatile canvas waiting for creative twists and flavor enhancements. Bakers can experiment with various ingredients to give this traditional dessert a modern spin.
Flavor Enhancements and Add-ins
To elevate your festive cherry bars, consider adding different spices or nuts. For instance, a hint of almond extract or the warmth of cinnamon can add depth to the cherry filling. You can also introduce other dried fruits like cranberries or cherries to create a fruit mix that complements the cherry layer.
Espresso powder is another excellent addition, especially for coffee lovers, as it intensifies the flavor without overpowering the cherries. For a crunchy texture, chopped nuts like almonds or pecans can be sprinkled on top before baking.
Dietary Adaptations
For those with dietary restrictions, it’s easy to adapt the Old Fashioned Christmas Cherry Bars to be gluten-free or vegan. Substitute traditional flour with a gluten-free blend to accommodate gluten intolerance. For a vegan version, replace eggs with flaxseed or chia seed eggs and use vegan butter or coconut oil.
These adaptations ensure that everyone can enjoy your christmas dessert recipe, regardless of dietary needs. The result is a deliciously inclusive holiday treat that maintains the essence of the original recipe.
Conclusion: Sharing the Joy of Traditional Holiday Baking
As the holiday season approaches, the tradition of baking classic Christmas treats brings people together. Old Fashioned Christmas Cherry Bars are a beloved part of this tradition, offering a sweet and tangy flavor that complements the season’s festivities.
Sharing these traditional holiday cookies with family and friends is a meaningful way to spread joy and create lasting memories. The process of baking and sharing these bars is just as important as the treats themselves, fostering a sense of community and connection.
By embracing the spirit of traditional holiday baking, you can create a sense of warmth and hospitality in your home. So, gather your ingredients, preheat your oven, and get ready to share the joy of Old Fashioned Christmas Cherry Bars with those around you.